Hey Folks!
In today’s digital world, staying connected while traveling is more important than ever. Whether you’re checking Google Maps, using WhatsApp, or posting photos on Instagram, you need internet access. However, buying a local SIM card or using expensive roaming plans can be confusing and costly, especially for those who are not tech-savvy.
That’s where Airnet Travel eSIM comes in.
If you don’t know what an eSIM is or how it works, don’t worry. In this guide, we’ll explain everything, step by step, so even a beginner or Non-tech user can understand and get connected in minutes.

An eSIM (short for embedded SIM) is a digital version of a SIM card. It works just like your regular SIM, but you don’t need to insert any physical card into your phone. Everything is done online!
With a travel eSIM, you can:
Airnet is one of the easiest and most beginner-friendly platforms to get a travel eSIM. Here’s why thousands of travelers trust us:

Setting up a travel eSIM may sound technical, but with Airnet, it’s as easy as using WhatsApp. There’s no need to visit a shop, no waiting, and no complicated steps.
Let’s go through each step in more detail:
The first step is to decide where you’re going and select the best eSIM plan for your trip. On the Airnet website or app, you’ll find a list of countries and regions we support. You don’t need to worry, just match the plan with your destination.

After selecting your destination, you can easily purchase your eSIM plan online in under two minutes. You don’t need to visit a shop, call anyone, or deal with paperwork. Everything happens right from your phone or computer, safely and instantly.
Once your payment is complete, Airnet will immediately send you an email with everything you need to get started. This includes your special QR code and a super simple setup guide that even first-time users can follow without confusion.
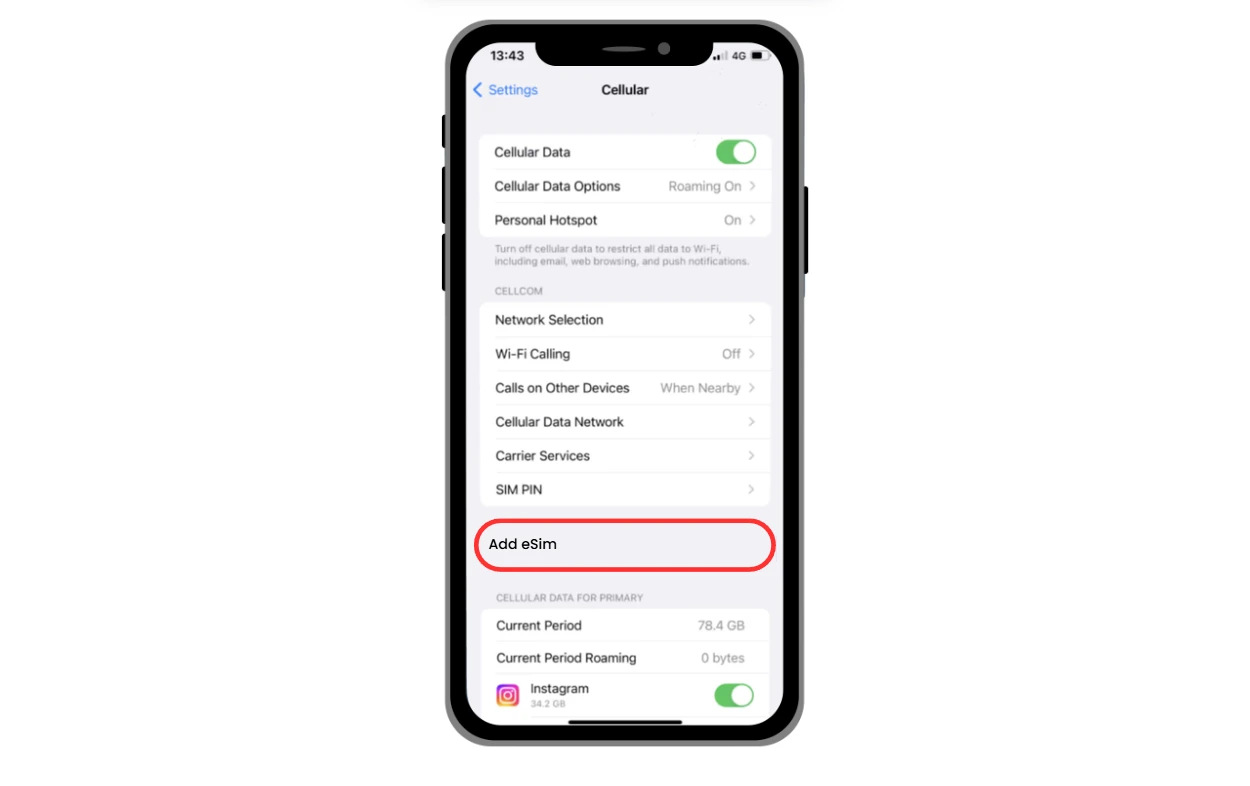
Now it’s time to add the eSIM to your phone. This may sound technical, but it’s really simple. You don’t need to remove your SIM card or change anything; just scan the code, and your Airnet internet will be ready.
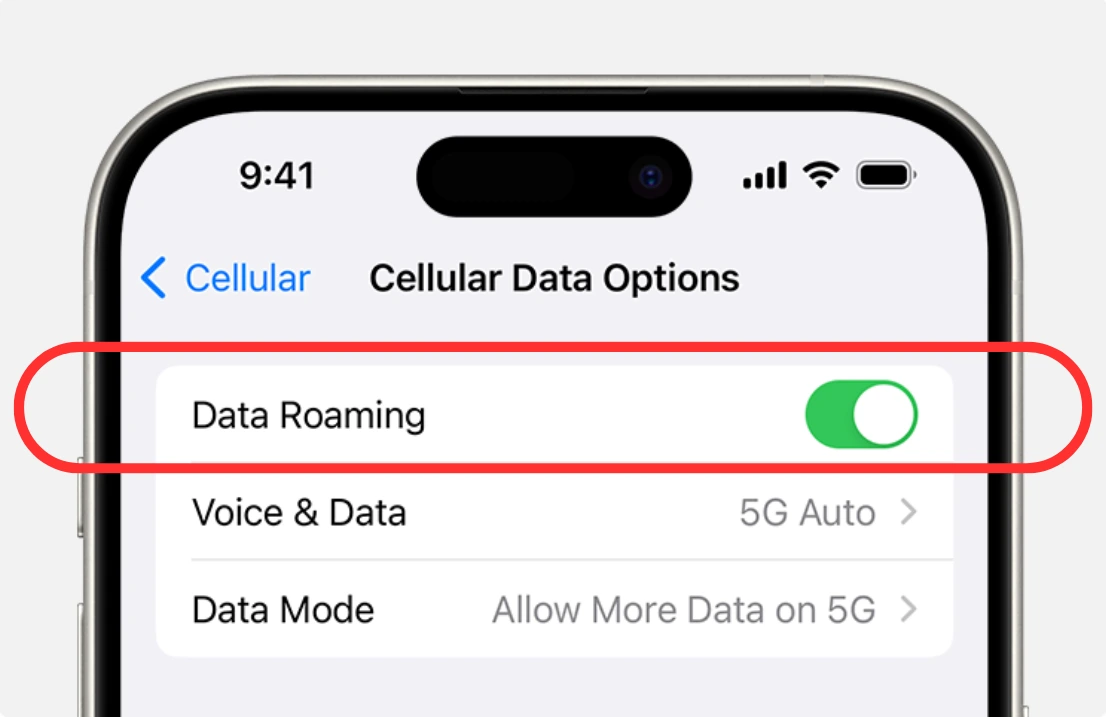
Before you start traveling, there’s one final step: turn on data roaming for your new Airnet eSIM. This lets your phone connect to local networks in your destination country, so your internet starts working right away when you land.
Now everything is set! As soon as your plane lands, your phone will automatically connect to Airnet’s partner network in that country. No need to search for Wi-Fi, buy SIMs, or ask for help, you’ll be online in seconds.

Before you get started, make sure your phone supports eSIM.
Most newer phones support it, including:
If you’re not sure, just search on Google: “Is my [Your Phone Model] eSIM compatible?”
No. You can keep your regular SIM in your phone and just use the eSIM for data.
The eSIM stops working. You can buy a new one anytime on Airnet.
Yes, When your data is low, open the AirNet app, go to your active eSIM plan, and tap “Top Up.” You’ll see different data options. Choose one, pay, and your data will be added right away no need to reinstall or scan anything again.
Airnet eSIMs are data-only, but you can use WhatsApp, Telegram, or Skype to make calls and send messages.
Yes! It’s better to install and test it before you travel, so everything works perfectly when you land.
Staying connected while traveling doesn’t have to be confusing or expensive. With Airnet’s travel eSIM, you don’t need to visit any store, deal with SIM cards, or ask for tech help. In just 6 easy steps, you can choose your destination, buy your plan online, scan a QR code, and start using fast internet the moment you land. No stress. No delays. Just a smooth, reliable connection in over 150 countries.
Whether you’re a first-time traveler or someone who’s never used an eSIM before, Airnet is made for you, simple, secure, and super convenient.